CREATING A LOGO PRESS

Inspiration
I began to formulate this project while taking History of Design Communication. It has been a goal of mine for a while at this point to create a label for myself as a designer, and while learning about printing presses and the history of typographic construction, I decided to create my own label and make my own press. I began this project by modifying Futura text in Adobe illustrator and exporting it as a dwg, placing it in autoCAD and then printing out the form on the laser cutter.
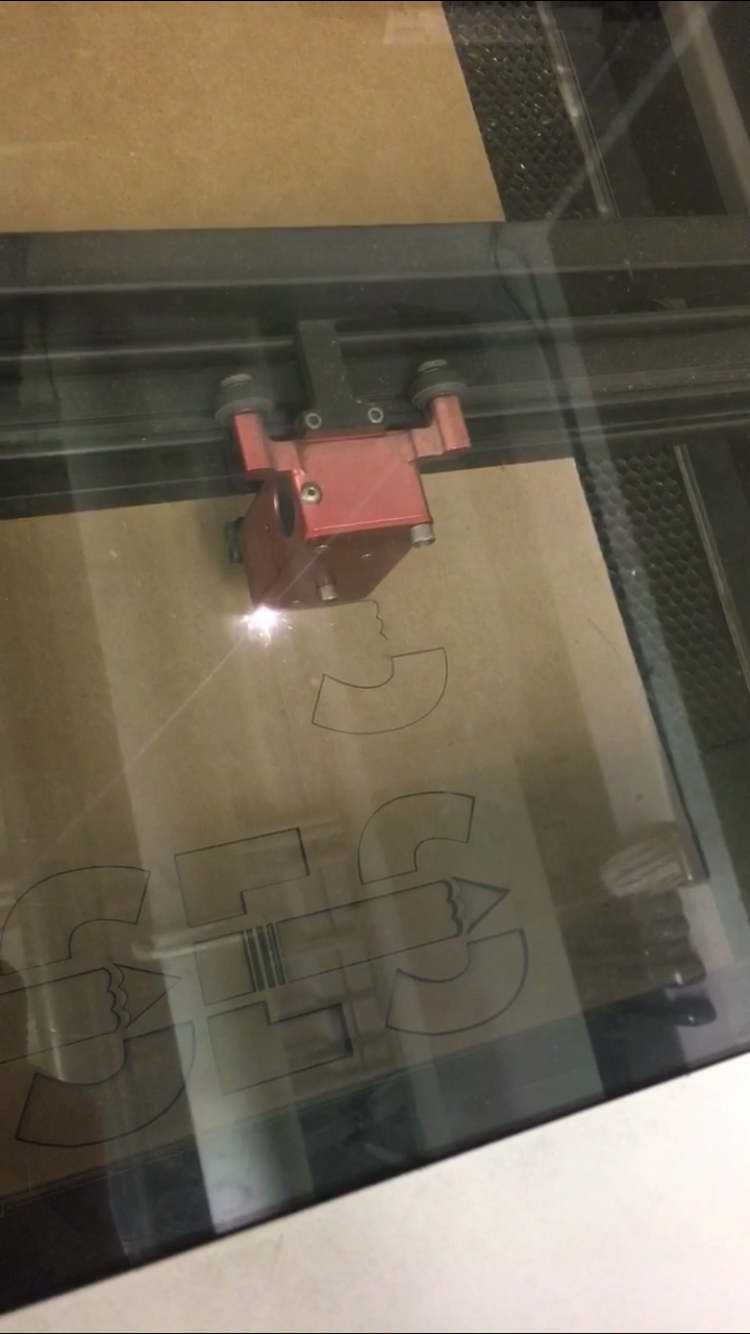
LASER CUTTING
After using autoCAD to render the cutting file, I used a cut sheet of 1/16” thick chipboard for the logos to be cut out on and set the X660 laser cutter to 75 power and 8 speed. I cut out a total of twenty six logos and only used eight of them for this project.

ASSEMBLy
After cutting out all of the logos on the sheet, I cut the sheet into strips and then pieces, placing the logos over the block of baltic birch and then taking off the strips of tape. I glued the back of each logo with Sobo and weighted down each layer, careful as to not mis-shape the eraser-basket lines. As you can see in the photo above, there is a bit of excess chipboard which I later removed with an X-acto knife.
PHOTOGRAPHY AND DOCUMENTATION
Many of the amazing photos of this project were taken by my close friend and aspiring photographer Zachary Jenson, (@zach.jenson.photography). Without his help the documentation stages of the pressing process would have been nearly impossible to achieve, as I wanted every moment captured.
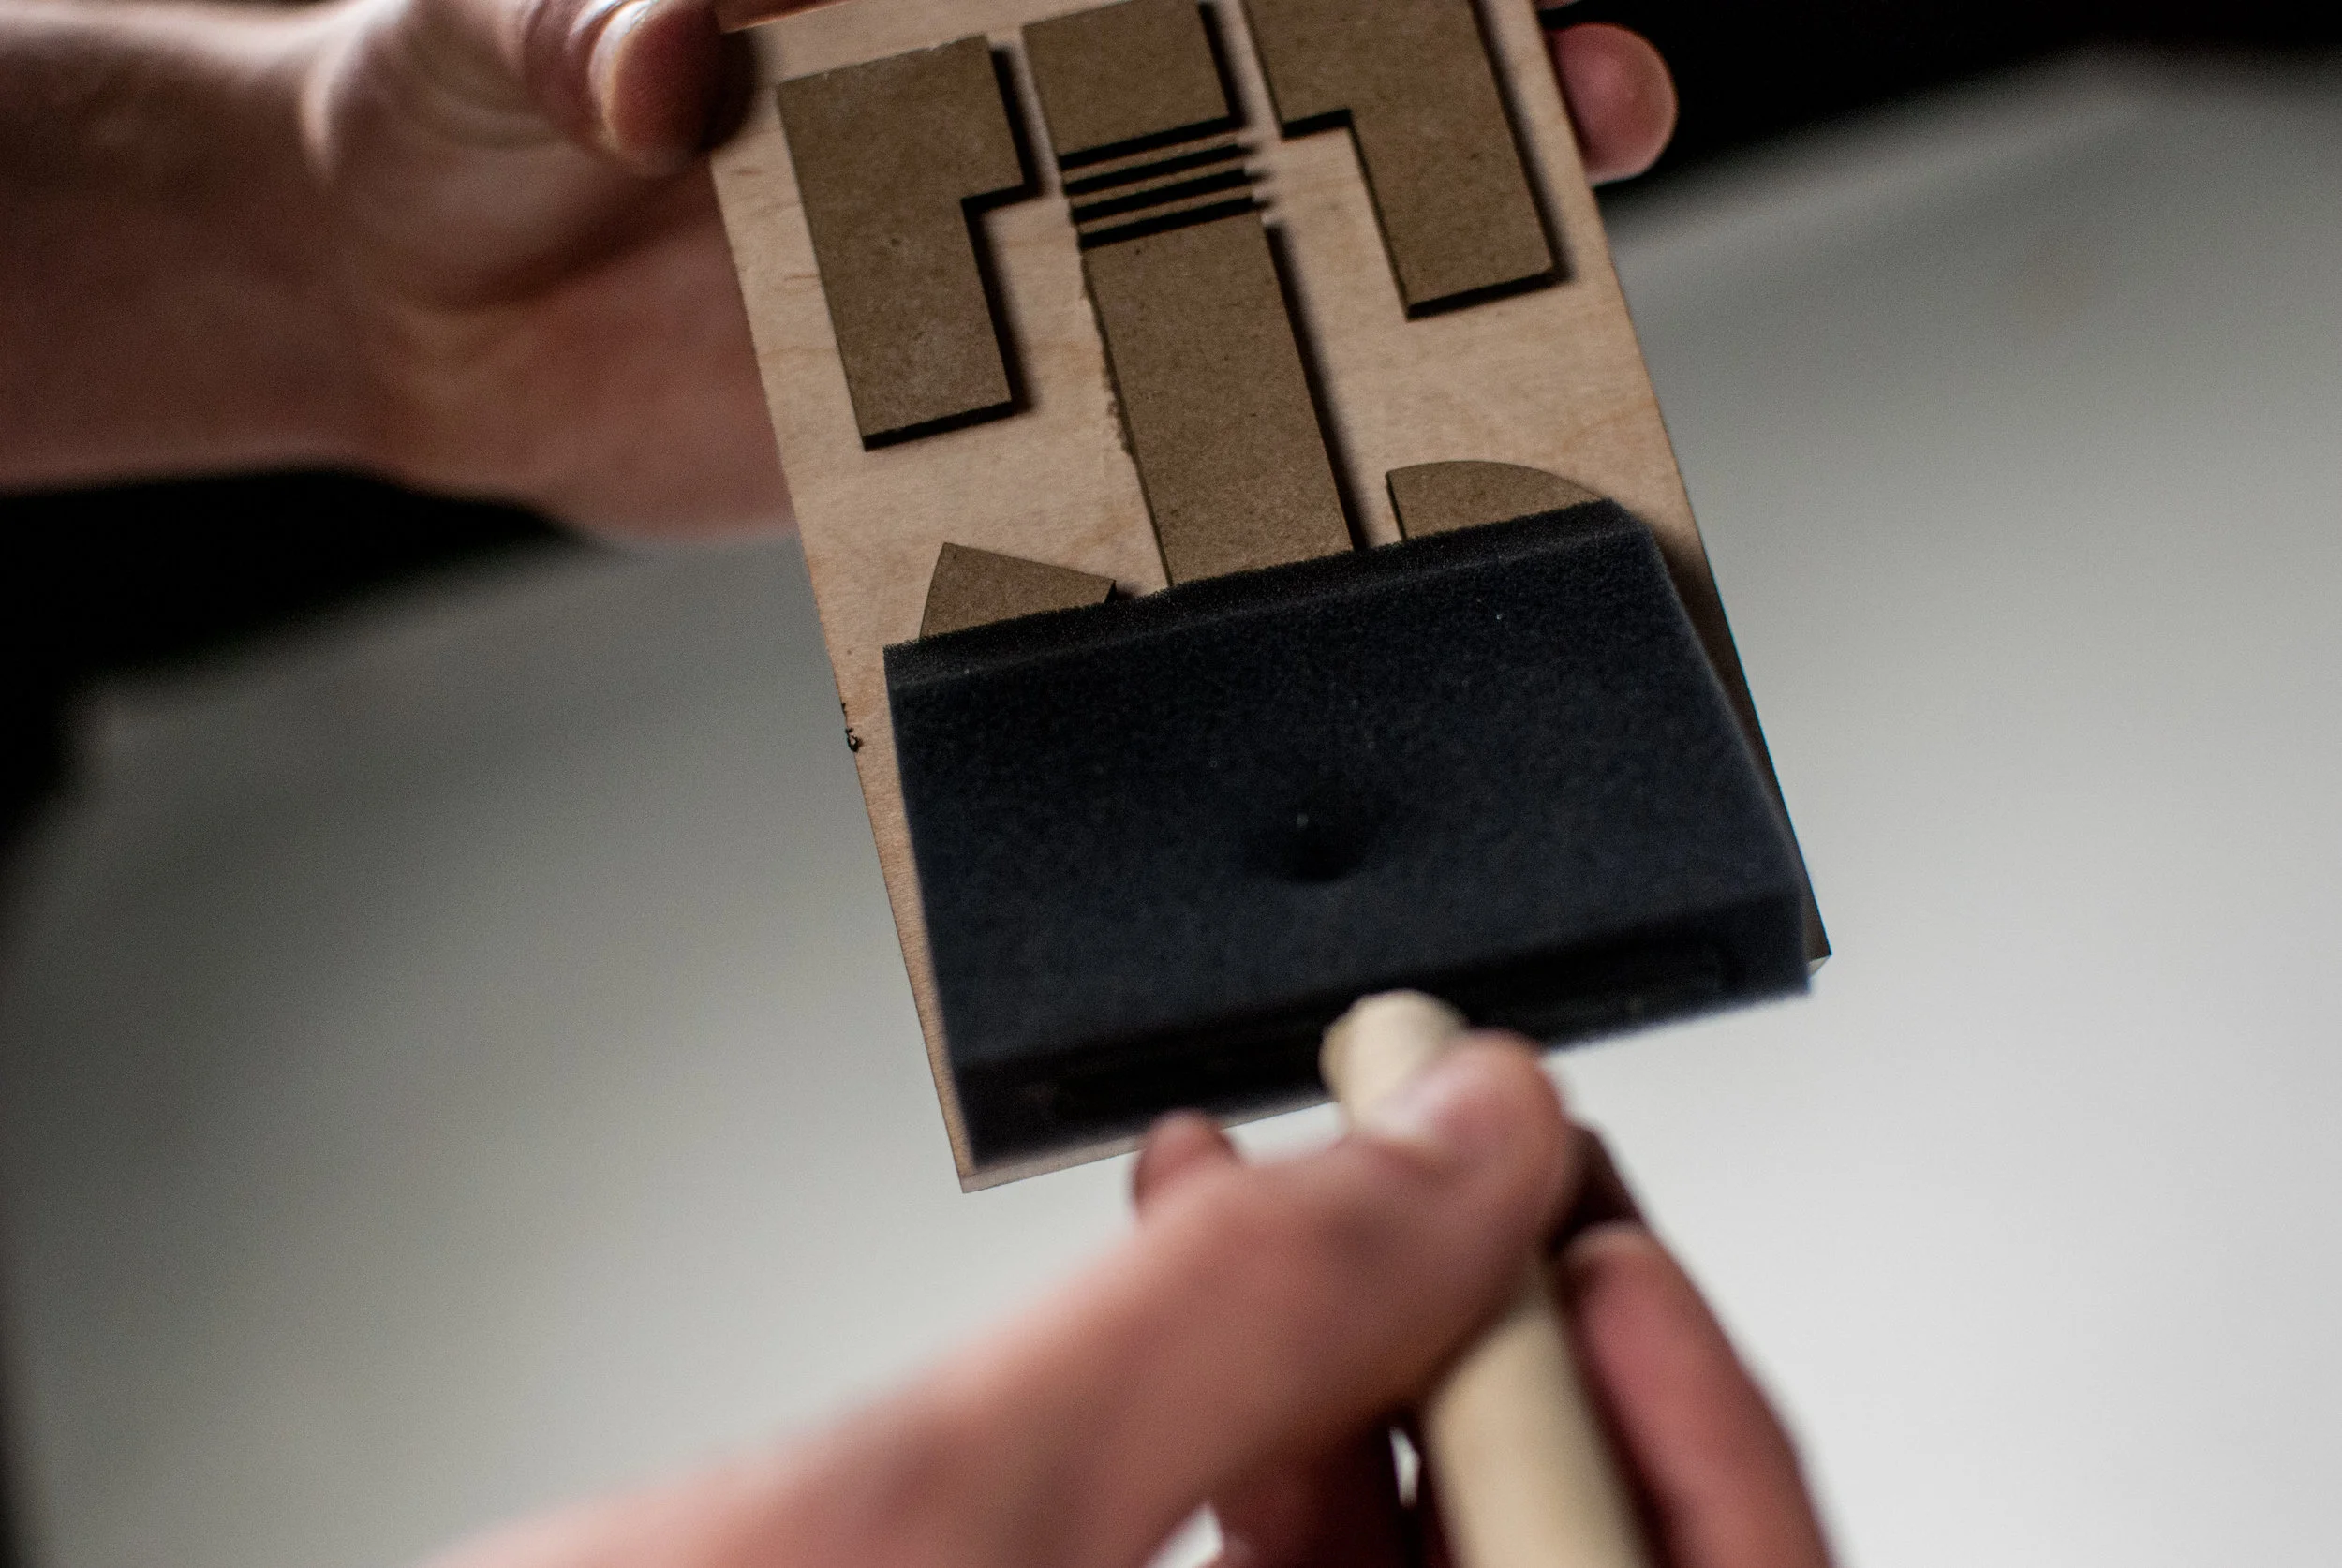
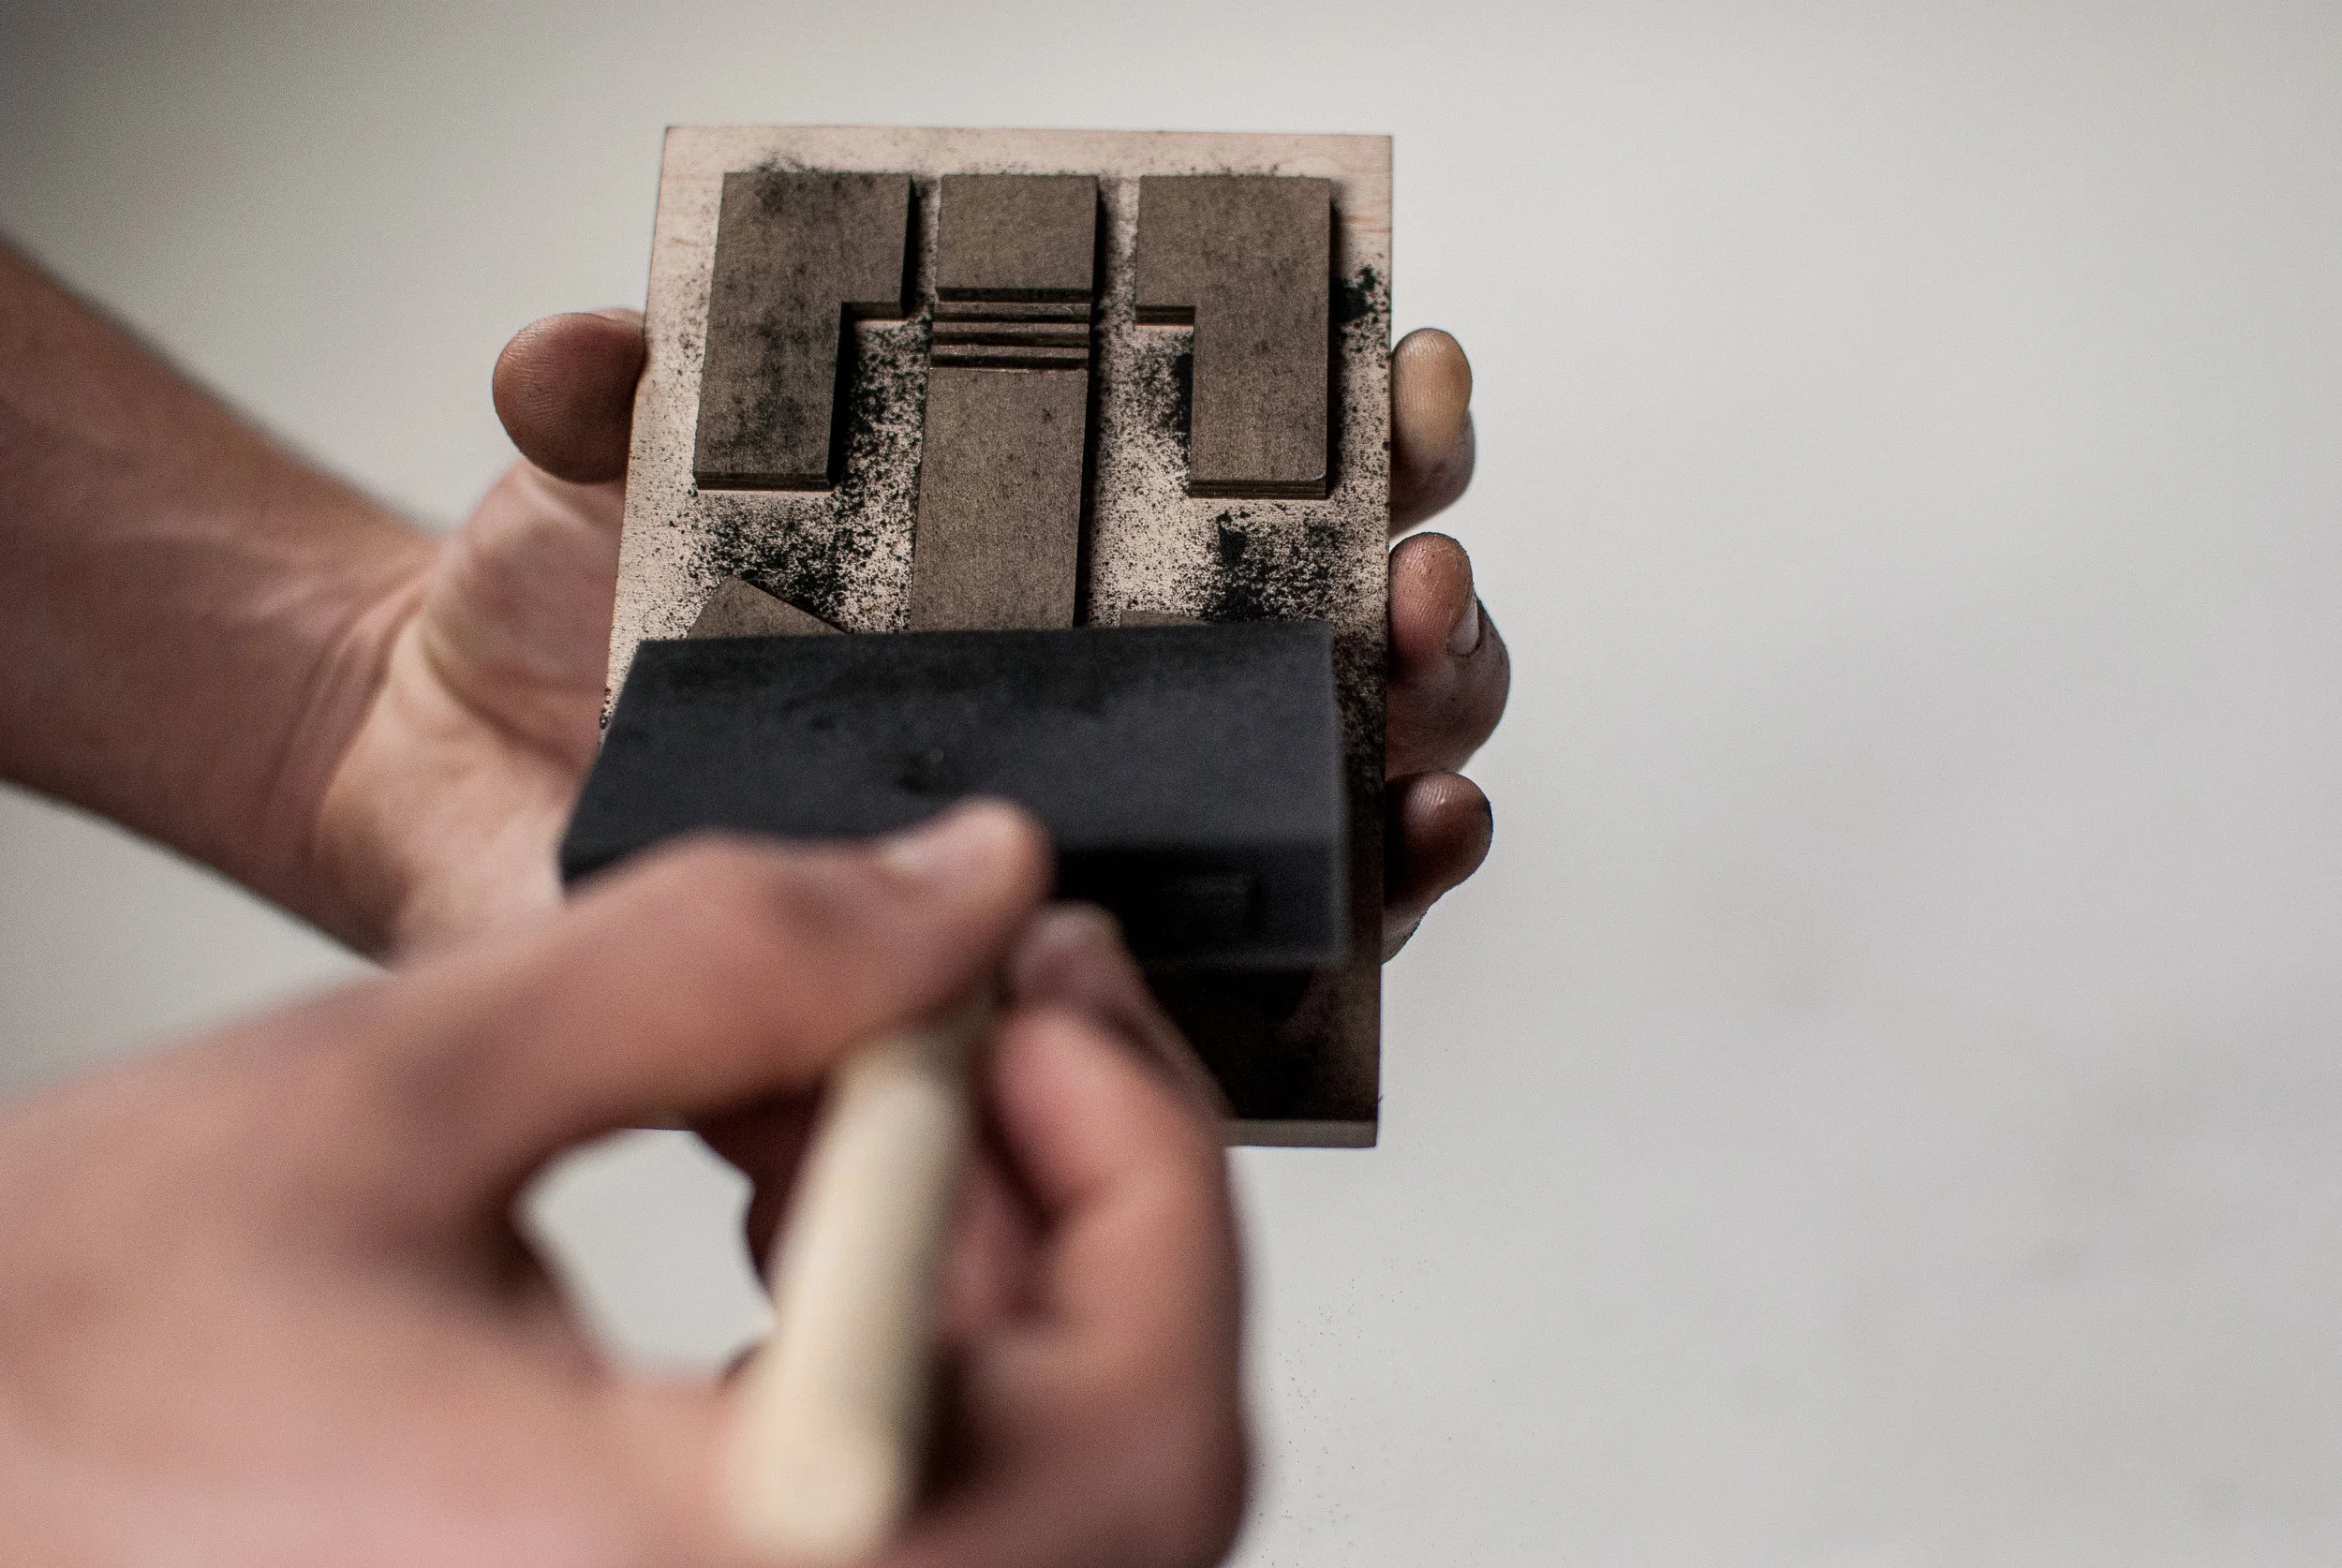
PRESSING THE STAMP
Shown in the gallery below, the pressing process was quite extensive. I used a jar of graphite to gently sprinkle a tablespoon’s worth of it onto the wooden handled sponge brush and then proceeded to gently stroke the edge of the brush against the chipboard logo. I wanted a thick enough coat where the outline of the letters would be very apparent, as I expected the graphite to gather at the edges. Consequently, I went over and over the stamp with a few coats before I pressed it with both hands against the paper.
Alternatively, I would have liked to have made this stamp out of silicone and used an ink base, but it would have been much harder to have molded the logo and would have required me to experiment with the power and speed of the laser cutter, which being school property, would not have been a very smart decision should I have broken or caused any damage to the machine.
As an industrial and product designer, I love seeing the things I create working. I think the highlight of this experience for me was taking the stamp back off the paper for the first time and seeing the outline of my logo.